Microsoft Internet Connection Sharing enables a computer connected to the Internet via a cable or DSL modem to share its connection with other computers connected to it.
- Method 1 of 2: On the Host Computer

1 Click Start, and then click Control Panel.

2 Click Network and Internet Connections, Click Network
Connections.

3 Right-click the connection that you use to connect to the
Internet. For example, if you connect to the Internet by using a modem,
right-click the connection that you want under Dial-up.

4 Click Properties. Click the Advanced tab.

5 Under Internet Connection Sharing, select the Allow other
network users to connect through this computer's Internet connection check box.

6 If you are sharing a dial-up Internet connection, select the
Establish a dial-up connection whenever a computer on my network attempts to
access the Internet check box if you want to permit your computer to
automatically connect to the Internet.

7 Click OK. You receive a message, Click Yes.
- Method 2 of 2: On the Host Computer

1 Click Start, and then click Control Panel. Click Network and
Internet Connections. Click Network Connections.

2 Right-click Local Area Connection, and then click
Properties.

3 Click the General tab, click Internet Protocol (TCP/IP) in
the This connection uses the following items list, and then click Properties.
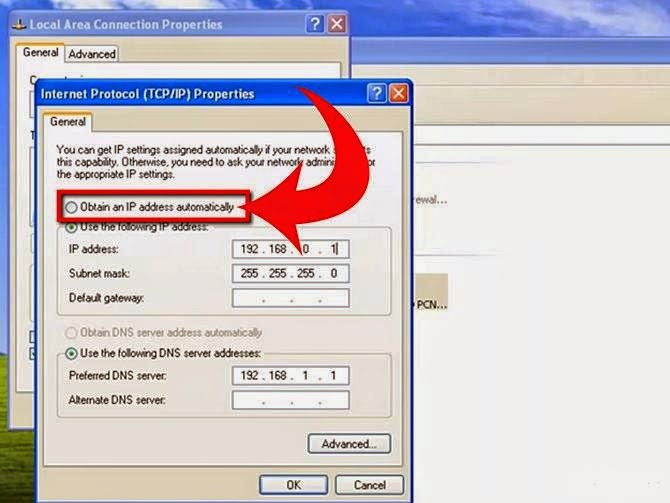
4 In the Internet Protocol (TCP/IP) Properties dialog box,
click Obtain an IP address automatically (if it is not already selected), and
then click OK.

5 In the Local Area Connection Properties dialog box, click OK.
6 Open your browser to check, if what you did works..
No comments:
Post a Comment